Introduction
In this tutorial, we will be setting up a lightning node docker container on a Synology Network-attached storage (NAS) device.
Background
Building on a previous tutorial that guides you through running a full bitcoin node on Synology NAS, we will utilise the same method to fire up a lightning node.
Let's get started
We will be deploying a c-lightning docker instance on testnet using Synology Disk Station Manager (DSM) and interact with it through SSH.
Prepare the environment
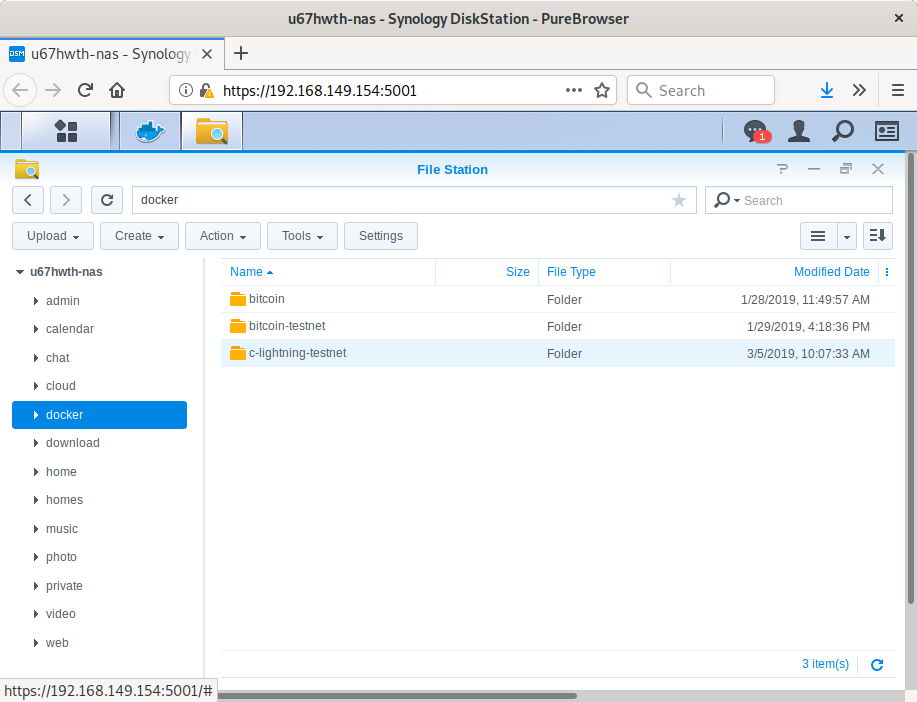
We first have to create a folder where lightning node data will be stored by opening File Station and creating the following folder /docker/c-lightning-testnet or any other name that suits your needs.
We then need to create a configuration file for lightningd. Open a new file with your favourite text editor, add the following line and save it as config - no extension - under the previously created folder.
alias=your_alias
network=testnet
bitcoin-rpcuser=your_rpcuser
bitcoin-rpcpassword=your_rpcpassword
bitcoin-rpcconnect=127.0.0.1
bitcoin-rpcport=18332
log-level=io
Install and run c-lightning
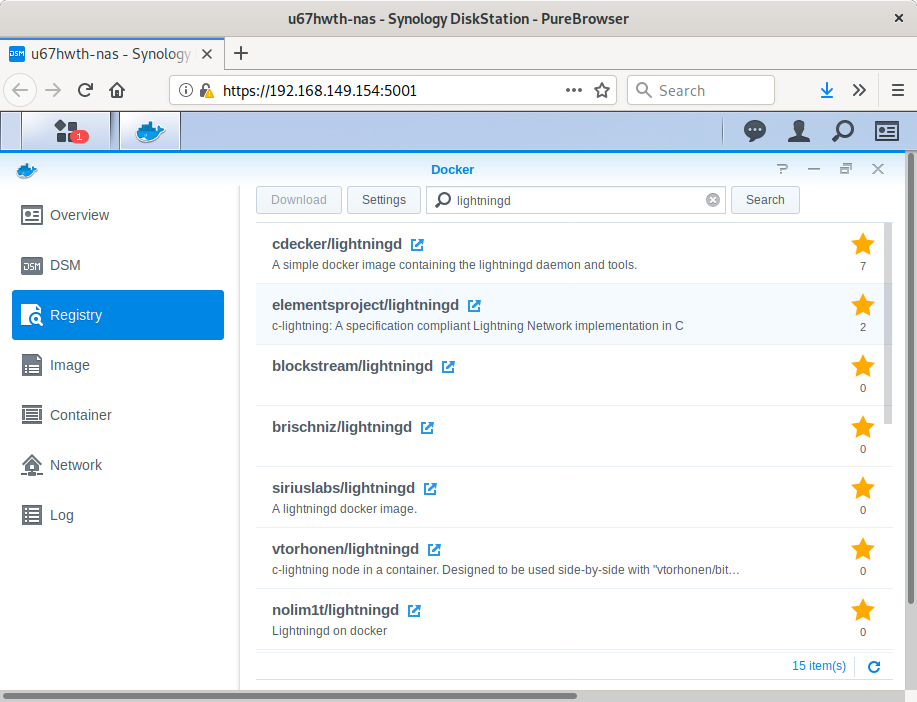
To install c-lightning we will use Docker and download the image published by Blockstream. Launch Docker through DSM, go to the Registry tab, search for lightningd and download the image from elementsprojects.
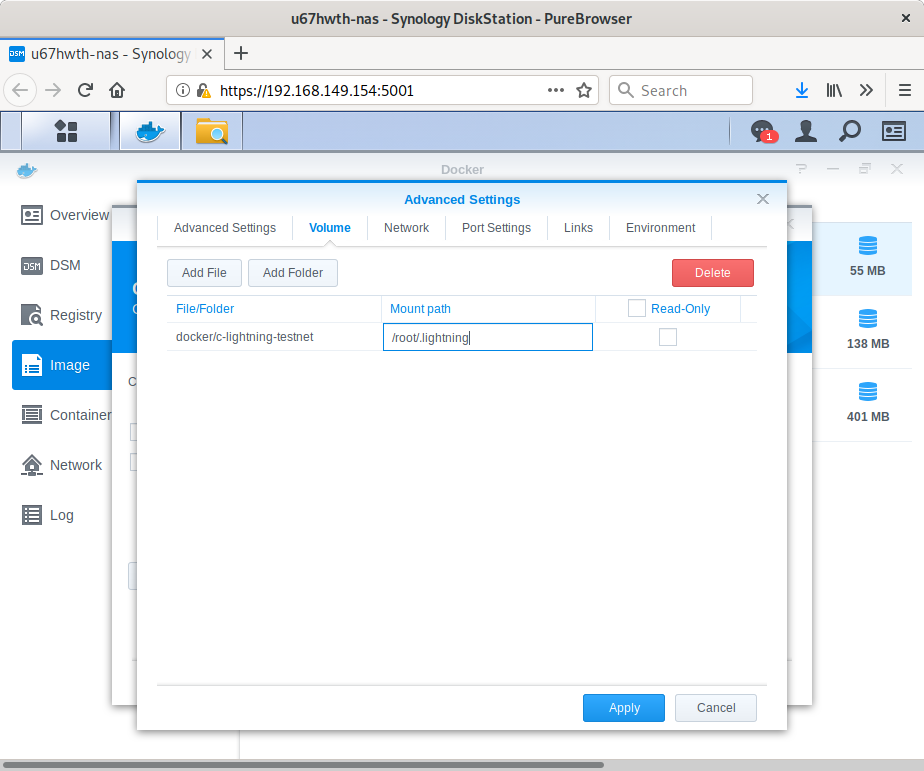
Once downloaded, we have to setup the container before starting it. Go to the Image tab, select the lightningd image and click Launch. Provide the preferred name and click the Advanced Settings option.
On the first tab, you may want to enable auto-restart to have your lightning node automatically booting up with your NAS. From the Volume tab, select Add Folder, enter your local path in File/Folder and /root/.lightning as Mount path.
We then select the Network tab and check the Use the same network as Docker host option, this simplify things going forward.
Note
For more information on network types please consult DiskStation Manager - Network Settings
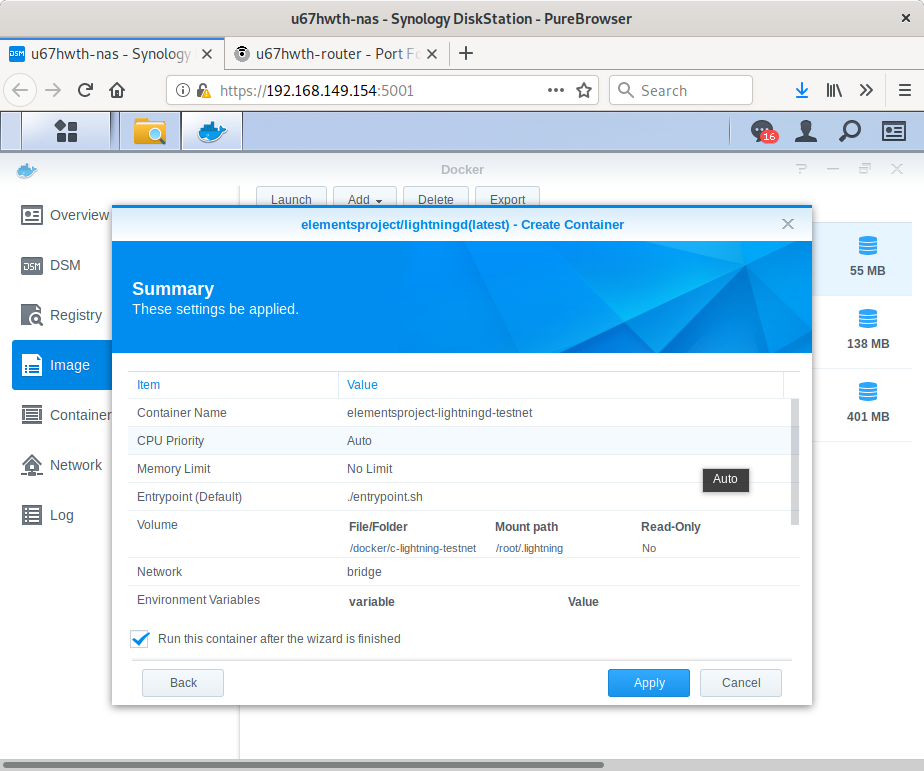
Finally, click Apply, followed by Next, and Apply to launch our container.
Sanity check
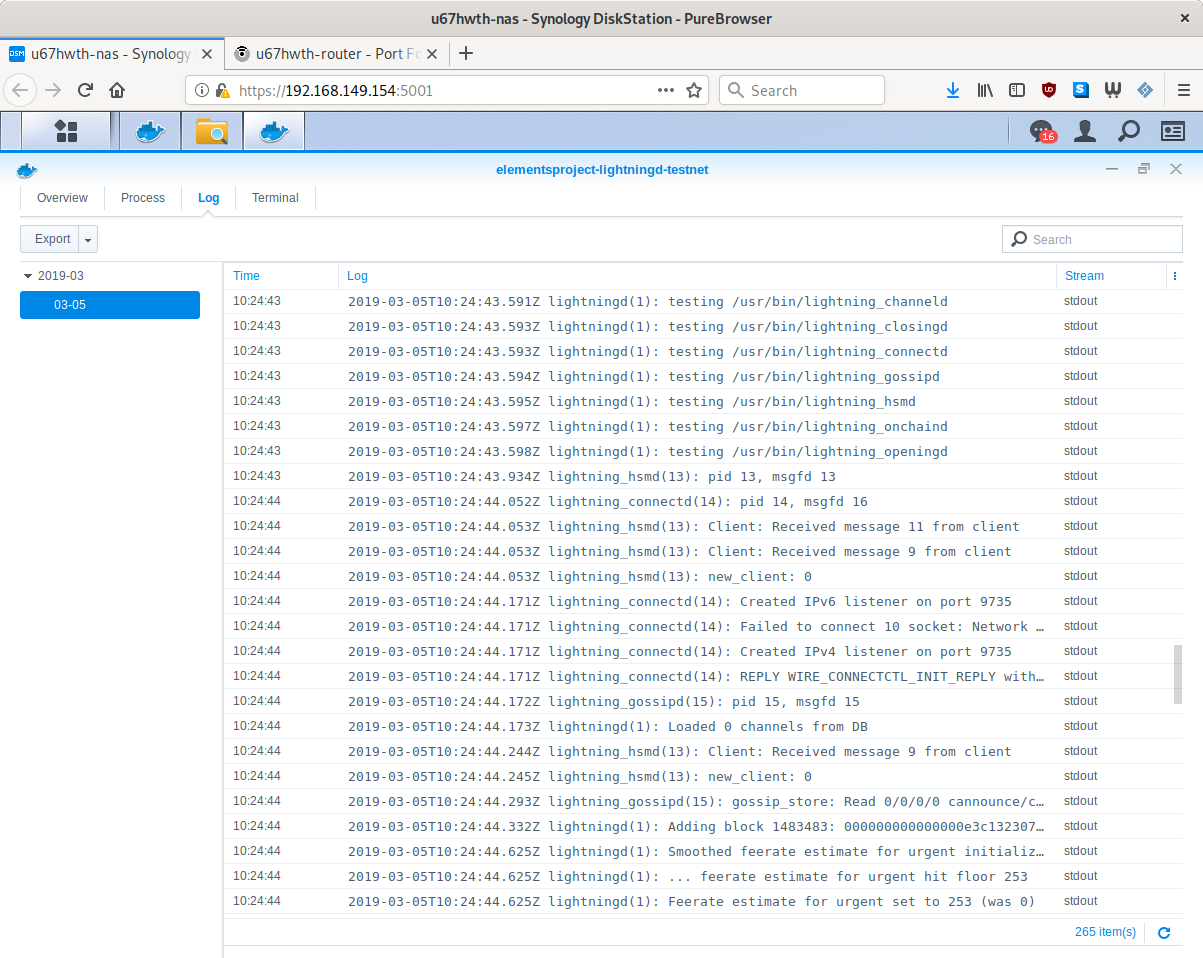
We can confirm the configuration and setup of our lightning node by viewing the lightningd logs. To do so, go to the Container tab, select the corresponding container and click Details. Select then the Log tab and see :)
Interact with lightningd
Connect to container's shell
While there is a Terminal tab in Docker GUI of DSM, it does not allow to paste text from the clipboard which makes it highly inconvenient. We will therefore connect to our c-lightning container shell through the terminal.
We can access our NAS terminal using ssh as follows.
Note
Please refer to these instructions to enable SSH access if not already done.
simon@librem13:~$ ssh [email protected]
[email protected]'s password:
Once connected to the NAS, we have can identify lightningd container id with the following command.
[email protected]:~$ sudo docker ps
Password:
CONTAINER ID        IMAGE                               COMMAND                  CREATED             STATUS              PORTS               NAMES
4766891d9956        elementsproject/lightningd:latest   "./entrypoint.sh"        7 hours ago         Up 4 hours                              elementsproject-lightningd-testnet
7ccba72be25c        kylemanna/bitcoind:latest           "docker-entrypoint..."   5 weeks ago         Up 4 hours                              kylemanna-bitcoin-testnet
3afb6423b342        kylemanna/bitcoind:latest           "docker-entrypoint..."   5 weeks ago         Up 7 days                               kylemanna-bitcoin
And finally connect to our container's shell as follows.
simon@u67hwth-nas:~$ sudo docker exec -it 4766891d9956 bash
Fund lightning node
We are now ready to interact with the lightning network, but first, we have to fund our node. We will begin by retrieving a payment address.
bash-4.4# lightning-cli newaddr
{
  "address": "tb1q2yt78az36rjfdek8g5jy969v2yq92tkc6282mx"
}
We can now send some testnet bitcoin to our lightning node. If you don't have any you can use Yet Another Bitcoin Testnet Faucet which works like a charm. Note that we will have to wait for three blocks before the status changes to confirmed which we can check using the listfunds command.
bash-4.4# lightning-cli listfunds
{
  "outputs": [
    {
      "txid": "f338a4cdd5de86a377b041410d9607090bc3d692408df628777bebf1b7df7697",
      "output": 0,
      "value": 1000000,
      "amount_msat": "1000000000msat",
      "address": "tb1q2yt78az36rjfdek8g5jy969v2yq92tkc6282mx",
      "status": "confirmed"
    }
  ],
  "channels": [
  ]
}
Open a channel
From the previous command we can also see that our channel list is empty, we will now open a channel with a random node to get started. Select one from 1ML and connect.
bash-4.4# lightning-cli connect 0269a94e8b32c005e4336bfb743c08a6e9beb13d940d57c479d95c8e687ccbdb9f 197.155.6.38 9735
{
  "id": "0269a94e8b32c005e4336bfb743c08a6e9beb13d940d57c479d95c8e687ccbdb9f"
}
Once connected, we can fund the channel as follows.
bash-4.4# lightning-cli fundchannel 0269a94e8b32c005e4336bfb743c08a6e9beb13d940d57c479d95c8e687ccbdb9f 20000
{
  "tx": "020000000001019776dfb7f1eb7b7728f68d4092d6c30b0907960d4141b077a386ded5cda438f30000000000ffffffff02204e0000000000002200200966df0e4d94b695688096bb752df2198eb68138f7753e0ccc4ec94e48a8e59686f30e00000000001600147466bc01544cef0960da1169ecdf4226826fc8eb0248304502210085f72af738bcf18a14a476375de56be99e930e18921c03228580ee78672b919e022071ffde485d43e8dd2d0dbf289fc29f3afe255259fcd99431bf806bd9c12819a7012103a77069a28dc036baea39cc9c861aba258ac83251b56edd601ef7b4fafa04560300000000",
  "txid": "c8fad66f6596941e3d39eb7044d5218c6328ace08d4f20afad96df9f85ee3cae",
  "channel_id": "ae3cee859fdf96adaf204f8de0ac28638c21d54470eb393d1e9496656fd6fac8"
}
Note
We won't be able to fund another channel before the previous is confirmed which we can check by using thelistfundscommand.
bash-4.4# lightning-cli listfunds
{
  "outputs": [
    {
      "txid": "c8fad66f6596941e3d39eb7044d5218c6328ace08d4f20afad96df9f85ee3cae",
      "output": 1,
      "value": 979846,
      "amount_msat": "979846000msat",
      "address": "tb1qw3ntcq25fnhsjcx6z957eh6zy6pxlj8tpl0dhg",
      "status": "confirmed"
    }
  ],
  "channels": [
    {
      "peer_id": "0269a94e8b32c005e4336bfb743c08a6e9beb13d940d57c479d95c8e687ccbdb9f",
      "short_channel_id": "1483554x95x0",
      "channel_sat": 20000,
      "our_amount_msat": "20000000msat",
      "channel_total_sat": 20000,
      "amount_msat": "20000000msat",
      "funding_txid": "c8fad66f6596941e3d39eb7044d5218c6328ace08d4f20afad96df9f85ee3cae"
    }
  ]
}
Get some inbound capacity
To complete our lightning node operating capabilities, we should get some inbound capacity, i.e. a node that opens a channel with ours but that's another story and not within the scope of this tutorial! Feel free to explore this further and let us know what you think!
Conclusion
We have a lightning node running on the bitcoin testnet using just a few clicks and commands. Please bear in mind the following from c-lightning README but do not hesitate playing around with it on the testing network.
This implementation is still very much a work in progress. It can be used for testing, but it should not be used for real funds.
Let's build :)
Reference
c-lightning at GitHub

Comments