Introduction
In this tutorial, we will be exploring some ideas around thinking of money as a native content type for the world wide web. It would appear that many have dismissed Sir Tim Berners-Lee's proposed ideas of the Semantic Web or "Web 3.0" as being the decetralised web.
That being said, we hardly incremented this pseudo term every time a new content type is added to the web specifications. Can you imagine if we had done that for text, images, sound or even video? So what does this have to do with Bitcoin you might ask? Well, Bitcoin has given us something more significant, complementary and native to web, and that is a new content type called money! So let's explore some ideas around what adding money means as an extension to the world wide web.
Background
This tutorial is inspired by a talk given on Money As A Content Type by Andreas Antonopolous. Since watching his talk, I've been exploring various ways in which this level of thinking could be applied to the web we know and love today.
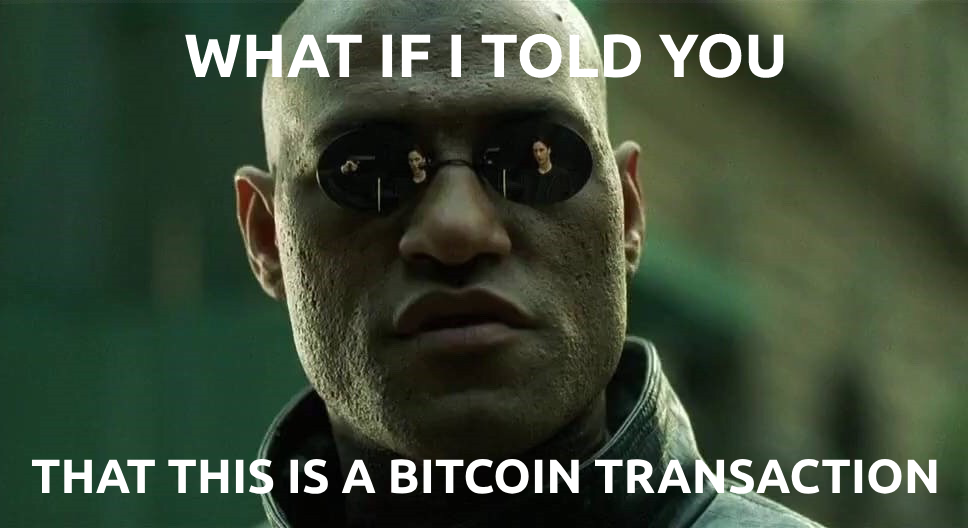
And yes, the image above is an example of a bitcoin transaction which has been encoded using steganography.
Note
This is not the most efficient way of encoding transaction data into a file. But you can imagine using this technique as an example for any other kind of data we have
You can confirm this for yourself by uploading it to the following site and selecting the Read option.
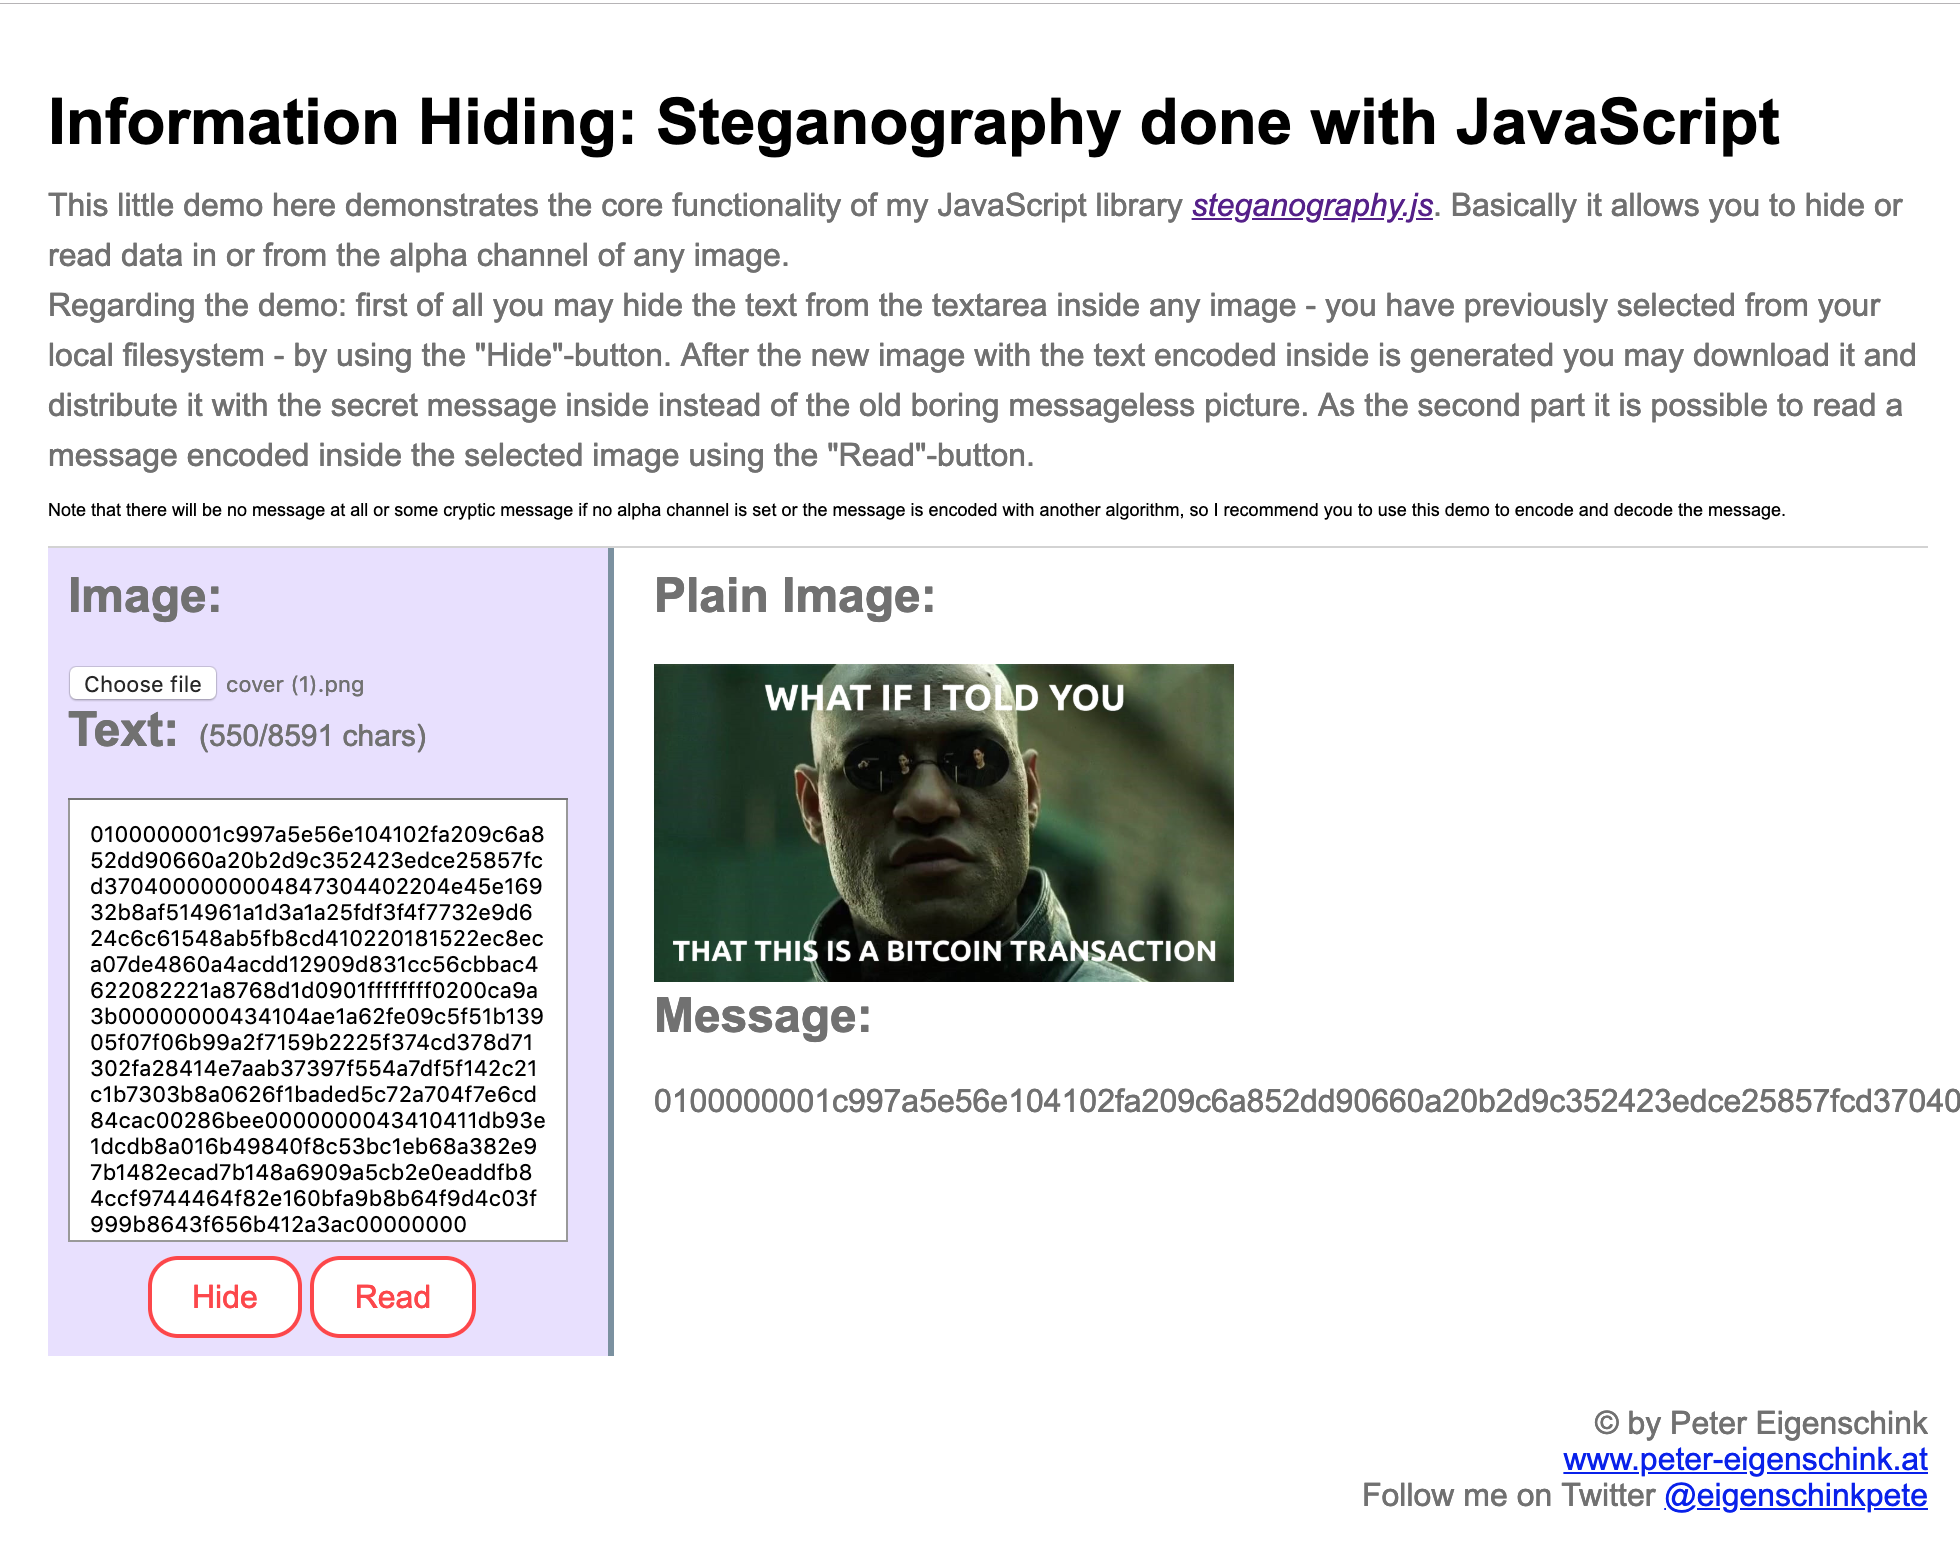
And decoding it on the console using the bitcoin explorer (bx) command. Please checkout our Primer for libbitcoin for more information.
gr0kchain@bitcoindev $ echo 0100000001c997a5e56e104102fa209c6a852dd90660a20b2d9c352423edce25857fcd3704000000004847304402204e45e16932b8af514961a1d3a1a25fdf3f4f7732e9d624c6c61548ab5fb8cd410220181522ec8eca07de4860a4acdd12909d831cc56cbbac4622082221a8768d1d0901ffffffff0200ca9a3b00000000434104ae1a62fe09c5f51b13905f07f06b99a2f7159b2225f374cd378d71302fa28414e7aab37397f554a7df5f142c21c1b7303b8a0626f1baded5c72a704f7e6cd84cac00286bee0000000043410411db93e1dcdb8a016b49840f8c53bc1eb68a382e97b1482ecad7b148a6909a5cb2e0eaddfb84ccf9744464f82e160bfa9b8b64f9d4c03f999b8643f656b412a3ac00000000 | bx tx-decode
transaction
{
    hash f4184fc596403b9d638783cf57adfe4c75c605f6356fbc91338530e9831e9e16
    inputs
    {
        input
        {
            previous_output
            {
                hash 0437cd7f8525ceed2324359c2d0ba26006d92d856a9c20fa0241106ee5a597c9
                index 0
            }
            script [304402204e45e16932b8af514961a1d3a1a25fdf3f4f7732e9d624c6c61548ab5fb8cd410220181522ec8eca07de4860a4acdd12909d831cc56cbbac4622082221a8768d1d0901]
            sequence 4294967295
        }
    }
    lock_time 0
    outputs
    {
        output
        {
            address_hash fc916f213a3d7f1369313d5fa30f6168f9446a2d
            script "[04ae1a62fe09c5f51b13905f07f06b99a2f7159b2225f374cd378d71302fa28414e7aab37397f554a7df5f142c21c1b7303b8a0626f1baded5c72a704f7e6cd84c] checksig"
            value 1000000000
        }
        output
        {
            address_hash 11b366edfc0a8b66feebae5c2e25a7b6a5d1cf31
            script "[0411db93e1dcdb8a016b49840f8c53bc1eb68a382e97b1482ecad7b148a6909a5cb2e0eaddfb84ccf9744464f82e160bfa9b8b64f9d4c03f999b8643f656b412a3] checksig"
            value 4000000000
        }
    }
    version 1
}
Fun fact
This is the first transaction to have ever taken place on the bitcoin network between Hal Finney and Satoshi Nakamoto. You can check it out on the block chain here f4184fc596403b9d638783cf57adfe4c75c605f6356fbc91338530e9831e9e16.
The Web vs The Internet
Andreas is also well known for having referred to Bitcoin as the internet of value, with Money as the first application.
Before we dive into things, let's first review the definitions of what we mean when referring to the internet vs the world wide web.
Internet
/ˈɪntənɛt/
noun
a global computer network providing a variety of information and communication facilities, consisting of interconnected networks using standardized communication protocols.
World Wide Web
noun
an information system on the Internet which allows documents to be connected to other documents by hypertext links, enabling the user to search for information by moving from one document to another.
For the purpose of this tutorial, we will be thinking of Bitcoin the network as our internet, and bitcoin the unit as our content for the word wide web.
Before we get started
You will need access to a bitcoin node. We suggest executing against a node configured in regtest mode so that we can have the freedom of playing with various scenarios without loosing real money. You can however execute these against either the testnet or mainnet configurations.
Note:
If you don't currently have access to a bitcoin development environment set up, dont' worry, we have your back! We've setup a web based mechanism which provisions your very own private session that includes these tools and comes preconfigured with a bitcoin node inregtestmode. https://bitcoindev.network/bitcoin-cli-sandbox/
Alternatively, we have also provided a simple docker container configured inregtestmode that you can install for testing purposes.gr0kchain:~ $ docker volume create --name=bitcoind-data gr0kchain:~ $ docker run -v bitcoind-data:/bitcoin --name=bitcoind-node -d \ -p 18444:18444 \ -p 127.0.0.1:18332:18332 \ bitcoindevelopernetwork/bitcoind-regtest
Let's get started
So let's explore what it means to think of money as a content type on the web.
Some primitives we have in bitcoin include Transactions, Blocks and Addresses, which might suggest that the following additional content types for the HTTP protocol be considered.
Content-Type: bitcoin/transaction
Content-Type: bitcoin/block
Content-Type: bitcoin/address
Edit
Thanks for a recommendation from macterra to swap our MIME type from primitive/category to category/primitive. So instead we might considerbitcoin/address,bitcoin/transactionandbitcoin/block.
We can also implement actions for GET or POST on addresses, which might relate to getting a new address, or posting a transaction to one.
So let's see how this might work.
Building an HTTP server
For the sake of simplicity, we'll be using javascript and nodejs to demonstrate some of the concepts.
We'll first install express for building an extensible http server, and a useful helper called nodemon which eases the development by reloading our code as we make changes.
gr0kchain@bitcoindev $ npm install express
gr0kchain@bitcoindev $ npm install -g nodemon
After you've installed these, create a file called index.js and add the following lines of code.
const express = require('express');
const app = express();

app.get('/', (req, res) => {
  res.send('Hello Bitcoin!');
});

const PORT = process.env.PORT || 8080;
app.listen(PORT, () => {
  console.log(`Server listening on port ${PORT}...`);
});
We test that everything is working as follows. First start our HTTP server.
gr0kchain@bitcoindev $ nodemon ./index.js
Then, in a separate terminal, test your server by issuing a request.
gr0kchain@bitcoindev $ curl http://localhost:8080
Hello Bitcoin!

Adding our custom content types
The HTTP 1.1 specification includes information on our common methods for GET and POST, and the less common ones, PUT, DELETE, CONNECTION, OPTION and TRACE. It also includes information on the HTTP Content-Type request and response headers.
The "Content-Type" header field indicates the media type of the associated representation: either the representation enclosed in the message payload or the selected representation, as determined by the message semantics. The indicated media type defines both the data format and how that data is intended to be processed by a recipient, within the scope of the received message semantics, after any content codings indicated by Content-Encoding are decoded.
Let's look at adding an address content-type to our server. To keep things simple, we'll be interfacing with a Bitcoin Core node via its remote procedure call (RPC) interface using a node package called bitcoind-rpc.
- Install
bitcoin-rpc.
gr0kchain@bitcoindev $ npm install bitcoind-rpc
- Add
bitcoind-rpcto yourindex.jsfile.
const RpcClient = require('bitcoind-rpc');

var config = {
    protocol: 'http',
    user: 'bitcoin',
    pass: 'local321',
    host: '127.0.0.1',
    port: '18332',
};

var rpc = new RpcClient(config);
Note There a are many ways in which you could achieve integration with bitcoin, some interesting libraries include bitcoinjs-lib, bcoin, bitcore to name just a few.
- Add an HTTP end-point for working with addresses.
app.get('/address', (req, res) => {
  rpc.getNewAddress(function(err, resp) {
    res.send(resp);
  })
});
- Test that our new method works.
gr0kchain@bitcoindev $ curl http://localhost:8080/address
{"result":"mx1R8iZjekd2EmqUktPUpbAGeED1mf78R1","error":null,"id":45307}
- Awesome stuff bitcoiner, now let's convert this into a content type. Update your
addressend-point to include thebitcoin/addresscontent type response header.
app.get('/address', (req, res) => {
  res.set('Content-Type', 'bitcoin/address');
  rpc.getNewAddress(function(err, resp) {
    res.send(resp);
  })
});
- Test to see if this works.
gr0kchain@bitcoindev $ curl -v http://127.0.0.1:8080/address
*   Trying 127.0.0.1...
* TCP_NODELAY set
* Connected to 127.0.0.1 (127.0.0.1) port 8080 (#0)
> GET /address HTTP/1.1
> Host: 127.0.0.1:8080
> User-Agent: curl/7.54.0
> Accept: */*
>
< HTTP/1.1 200 OK
< X-Powered-By: Express
< Content-Type: bitcoin/address; charset=utf-8
< Content-Length: 71
< ETag: W/"47-ItepdBa7ZtjUhF+M8YYAfYua7dM"
< Date: Mon, 25 Feb 2019 09:48:40 GMT
< Connection: keep-alive
<
* Connection #0 to host 127.0.0.1 left intact
{"result":"mkCrmL6tCTDgExPXUkwQsYVRjEvC1Susfb","error":null,"id":77908}
Interacting with Bitcoin content types
Now that we've setup a bitcoin content type for address, let's see how we can consume this from our http client.
- Create a file called
static/index.html
<!doctype html>
<html>
  <head>
    <title>Bitcoin Markup</title>
  </head>
  <body>
  </body>
</html>
- Install axios for implementing http requests from the browser.
gr0kchain@bitcoindev $ npm install axios
gr0kchain@bitcoindev $ cp ./node_modules/axios/dist/axios.min.js ./static/
- Next, we'll create a Web component for our address element at
static/address.html
<template id="bitcoin-address">
  <div> Address
    <slot name="address">Address goes here</slot>
  </div>
</template>
<script language="javascript" src="axios.min.js">
</script>
<script>
(function() {
  // Update our bitcoin-address element with an address from the server
  axios.get('/address').then((resp) => {
    if ( /bitcoin\/address/.test(resp.headers['content-type'])) {
      document.getElementsByTagName("bitcoin-address")[0].innerHTML = "<span slot='address'>" + resp.data.result + "</slot>";
    }
  })

  class BitcoinAddress extends HTMLElement {
    constructor() {
      super();
      const template = document.querySelector('link[rel="import"]').import
      const templateContent = template.getElementById("bitcoin-address").content
      const shadowRoot = this.attachShadow({ mode: "open" }).appendChild(
        templateContent.cloneNode(true)
        )
    }
  }

  customElements.define("bitcoin-address", BitcoinAddress);
})()
</script>
Note We are intentionally only rendering this element assuming we've received a
content-typeofaddress/bitcoinin the response headers from our server.
- Update our
index.jsfile to serve this html file
const path = require('path');
app.use('/static', express.static(path.join(__dirname, 'static')))
- Finally, let's add our newly created web component to our html file
<!doctype html>
<html>
  <head>
    <title>Bitcoin Markup</title>
    <link rel="import" href="address.html">
  </head>
  <body>
    <bitcoin-address>
    </bitcoin-address>
  </body>
</html>
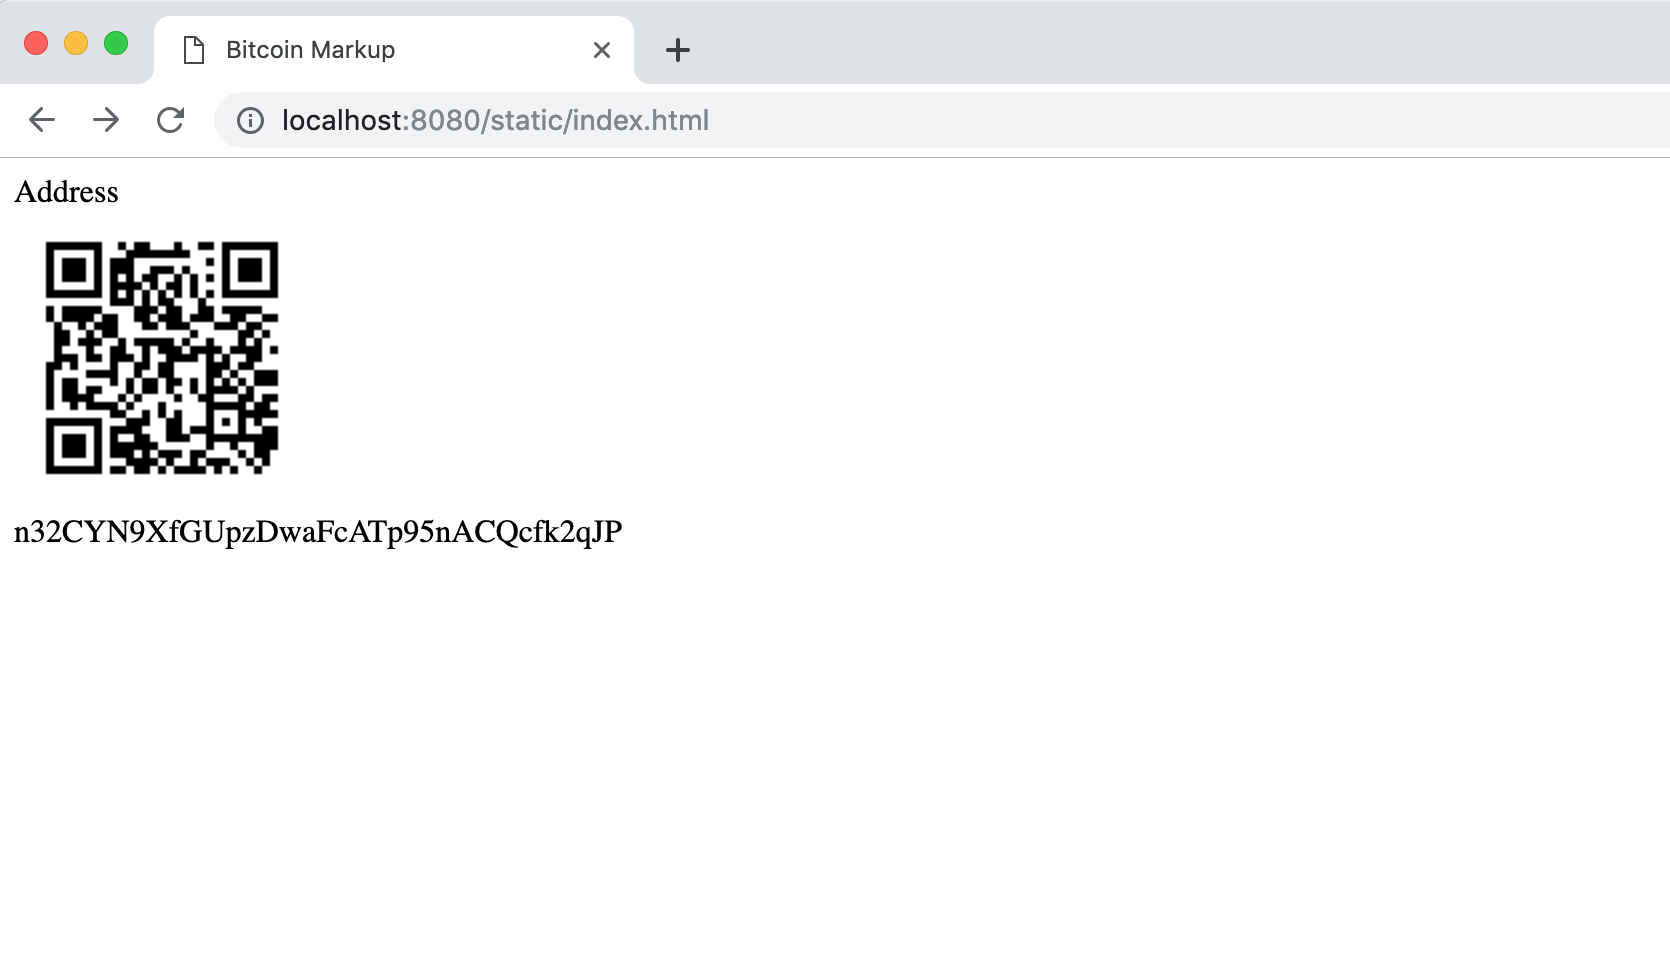
- We can test to see if this works by opening the page in our browser.

Note Due to the RPC call to our server, each refresh should show a new address.
Adding some features
So we've been able to print out the address creating our very own custom bitcoin web component. How about we customise this to render a QR Code for us.
- Update our
address.htmltemplate to include acanvaselement.
<template id="bitcoin-address">
    <div>Address<br />
      <canvas id="canvas"></canvas>
      <div>
        <slot name="address">Address goes here</slot>
      </div>
    </div>
</template>
- We should add a qrcode package to our application.
gr0kchain@bitcoindev $ npm install qrcode
gr0kchain@bitcoindev $ cp ./node_modules/qrcode/build/qrcode.min.js ./static/
- Update our
address.htmlto referenceqrcode.min.js
<template id="bitcoin-address">
    <div>Address<br />
      <canvas id="canvas"></canvas>
      <div>
        <slot name="address">Address goes here</slot>
      </div>
    </div>
</template>
<script src="qrcode.min.js">
</script>
- Update our
address.htmlto implement theconnectedCallbackmethod, and move ouraxiosrequest together withqrcodegeneration here.
  (function() {
    // Update our bitcoin-address element with an address from the server

    class BitcoinAddress extends HTMLElement {
      constructor() {
        super();
        const template = document.querySelector('link[rel="import"]').import
        const templateContent = template.getElementById("bitcoin-address").content
        const shadowRoot = this.attachShadow({ mode: "open" }).appendChild(
          templateContent.cloneNode(true)
        )
      }

      connectedCallback() {
        axios.get('/address').then((resp) => {
          if ( /address\/bitcoin/.test(resp.headers['content-type'])) {
            document.getElementsByTagName("bitcoin-address")[0].innerHTML = "<span slot='address'>" + resp.data.result + "</slot>";
            var canvas = document.getElementsByTagName('bitcoin-address')[0].shadowRoot.childNodes[1].childNodes[3]
            var elements = document.getElementsByTagName('bitcoin-address')
            QRCode.toCanvas(canvas, "bitcoin:" + resp.data.result, function (error) {
              if (error) console.error(error)
                console.log('success!');
            })
          }
        })
      }
    }
    customElements.define("bitcoin-address", BitcoinAddress);
  })()
- Test to see if our QR code renders by refreshing out application in the browser.
Imagine the power of combining this by extending your browser with a browser extension.
You can download a copy of the final source code here.
We can extend our application with additional content types for handling primitives including transactions and blocks. Why not try and implement these yourself.
As a bonus, Andreas also hinted at expressing transactions as Emojis, so writing an encoder/decoder for this should be fun!
Conclusion
In this tutorial, we looked at how treating Bitcoin as a new content type within context of the web might be implemented.

Comments